

If you are asking how much it costs to install DStv in South Africa in 2026, the direct answer is
that a professional DStv installation usually costs between R850 and R2,500, depending on the
type of installation, whether you already own equipment, the decoder you choose, how much
cable is required, and whether your home needs extra viewing points. A basic setup using an
existing satellite dish is usually cheaper because the installer only needs to reconnect the
decoder, test the signal, and confirm channel activation. A full installation that includes a new
dish, Smart LNB, bracket, cable, connectors, and decoder setup usually costs more because all
hardware must be supplied and professionally aligned. In homes where multiple rooms need
television access, where roof access is difficult, or where long cable distances are involved, the
price may rise beyond R2,500 because extra labour and materials are required.
For many South African households, installation quality matters more than choosing the lowest
quote. A dish that is not aligned correctly may work during clear weather but fail during rain,
wind, or cloudy conditions. Professional installers use signal meters to lock the strongest signal
and make sure the dish is mounted securely enough to stay stable for years. In 2026, more homes
are also upgrading to newer decoder systems, and these require precise Smart LNB setup to
avoid signal interruptions. Understanding what affects installation cost helps customers make
better decisions and avoid repeated repair expenses later.
Detailed Breakdown of DStv Installation Costs in South Africa for 2026
DStv installation prices vary because no two homes are exactly the same. Some homes already
have old dishes that can still be used, while others need a completely new installation from the
beginning. Property size, roof height, and signal obstacles all affect final pricing.
A standard installation usually includes:
- Satellite dish
- Smart LNB
- Mounting bracket
- Coaxial cable
- F-connectors
- Decoder setup
- Signal alignment
- Final channel testing
The average current price ranges are:
| Installation Type | Estimated Cost |
| Basic installation using existing dish | R850 – R1,200 |
| Full standard installation with new dish | R1,500 – R2,000 |
| Explora installation with Smart LNB | R2,000 – R2,500 |
| Extra TV point setup | R350 – R700 |
| Signal repair | R450 – R850 |
| Dish relocation | R650 – R1,200 |
Several technical factors influence these prices.
Distance Between Dish and Decoder
Long cable routes require more cable and often additional connectors, which increases cost.
Roof Height and Access Difficulty
A high roof or difficult installation surface increases labour time because mounting becomes
more technical.
Condition of Existing Equipment
If an old dish or cable is damaged, replacement becomes necessary.
Decoder Type Installed
Newer decoders such as Explora often require Smart LNB systems and more technical setup.
Signal Environment Around the Home
Nearby walls, trees, and buildings can affect dish placement.
This is why installers often inspect the property before giving a final price.
How Long Does It Take to Install DStv?
A standard DStv installation in South Africa usually takes between 45 minutes and 2 hours, but
the actual time depends on the property type, the complexity of the installation, the condition of
existing equipment, and whether the installer is completing a brand-new setup or working on an
existing system. In many cases, a simple home installation can be completed quickly, while
apartments, townhouses, and office buildings often require extra time because of cable routing,
access restrictions, and signal positioning.
For a basic residential setup, installation is usually faster when:
- A satellite dish is already installed and still aligned correctly
- Only decoder setup or reconnection is needed
- Cable routes are short and accessible
- The wall bracket is already mounted securely
- No replacement of damaged parts is required
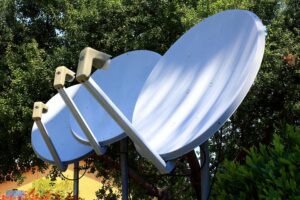
A straightforward single-view installation in a house with easy roof access can often be completed within one hour. However, when a technician needs to install a new dish, replace old
cable, reposition the bracket, or improve signal quality, the process can move closer to two hours
or more.
Full DStv installations usually take longer because several technical stages must be completed
carefully to ensure strong signal quality and long-term viewing stability. A professional installer
does not simply connect a decoder and leave. Every step affects signal strength, channel stability,
and how well the system performs during bad weather.
Dish Positioning and Satellite Direction
The first stage of installation is identifying the correct position for the satellite dish. This is one
of the most important parts of the entire process because the dish must face the correct satellite
direction with no obstruction from trees, walls, neighbouring buildings, or roofing structures.
A technician usually checks:
- Roof height
- Wall strength
- Open sky visibility
- Distance from decoder location
- Safe drilling position
Even a slight dish angle error can reduce signal quality, so proper positioning often takes time. In
some homes, the best signal location may not be the most convenient cable route, which means
installers must balance signal quality with practical cable placement.
If the property already has an old dish installed, the technician must first inspect whether:
- The dish is still structurally sound
- Rust has affected the mount
- The LNB still works correctly
- Previous alignment remains accurate
When old equipment needs adjustment, installation time increases.
Secure Bracket Installation
The bracket must be mounted firmly because future movement can cause signal loss, especially
during wind or storms. A poorly secured bracket is one of the most common reasons households
later experience signal interruption.
Professional installers spend time ensuring:
- Wall plugs are secure
- Mounting bolts are tight
- Bracket angle is level
- Dish weight is fully supported
On double-storey houses or difficult wall surfaces, bracket installation may take longer because
drilling requires extra care.
In townhouses, installers often work within limited exterior wall space, so bracket placement
must also follow body corporate rules in some complexes.
Cable Routing Through Walls or Roof Spaces
Cable routing is another stage that often determines whether installation finishes quickly or takes
longer. If the decoder is located near the dish mounting point, cable routing is simple. However,
long cable runs can significantly extend installation time.
Cable routing takes longer when:
- Walls are thick concrete
- Roof spaces are difficult to access
- Cable must pass through ceilings
- Hidden routing is requested for cleaner appearance
Professional installers aim to protect cable from weather exposure and future wear.
Good cable installation includes:
- Secure cable clips
- Waterproof external joints
- Minimal sharp cable bends
- Safe entry points into the building
Poor cable routing often causes future signal loss, so experienced installers take time to complete
this correctly.
Signal Meter Calibration
Once the dish and cable are installed, signal calibration begins. This stage is highly technical
because the installer uses a signal meter to align the dish precisely for maximum signal strength.
Signal calibration includes checking:
- Channels disappearing
- Signal loss during rain
- Freezing picture quality
- Weak HD performance
This process can take several minutes because small dish movements must be tested carefully
until the strongest signal is achieved.
Without proper calibration, customers often experience:
- Channels disappearing
- Signal loss during rain
- Freezing picture quality
- Weak HD performance
Professional signal calibration is one of the biggest differences between quality installation and
poor installation.
Decoder Setup and Channel Testing
After signal alignment is complete, the decoder must be connected and tested fully. This stage
includes more than simply switching the decoder on.
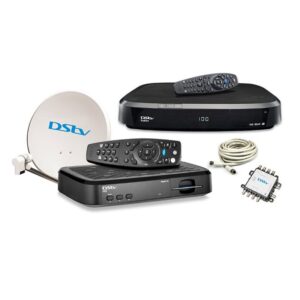
The installer usually completes:
- Decoder cable connection
- HDMI or AV connection
- Power supply check
- Channel scan
- Signal verification
- Decoder communication test
For newer decoder systems such as Explora, setup can take longer because Smart LNB
communication must be confirmed correctly.
Each channel must be checked carefully to ensure:
- Clear picture quality
- Stable audio
- Correct package reception
- Fast decoder response
This final stage is essential because many future service calls happen when installation leaves
unnoticed setup errors.
Apartment DStv Installation Time
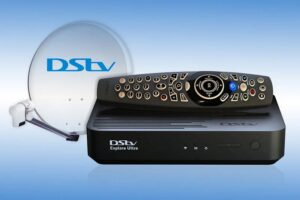
Apartment installations often take longer than houses because technicians must work around
access restrictions and mounting limitations.
Extra time is often needed because:
- Balconies may limit dish direction
- Shared wall permission may be required
- Cable routes must remain discreet
- Existing shared systems may need inspection
Some apartment buildings already use communal dish systems, which means installers must first
check compatibility before decoder setup.
In high-rise apartments, signal direction can also be affected by neighbouring structures,
increasing alignment time.
Townhouse DStv Installation Time
Townhouses often appear simple but can require extra planning because of shared walls and
complex cable paths.
Installers often need to consider:
- Estate regulations
- Limited dish mounting points
- Hidden cable routes
- Existing shared infrastructure
Townhouse installations usually take between one and two hours depending on these factors.
Office and Business DStv Installation Time
Business installations can take longer because multiple viewing points often need separate signal
outputs.
Office installations may require:
- Multiple decoders
- Extra cable runs
- Signal splitters
- Multiple screen testing
Restaurants, waiting rooms, reception areas, and office boardrooms often need more careful
cable planning than residential properties.
Why Professional Installation Saves Time Later
A fast installation is useful, but a correct installation saves more time in the long run. Poor
workmanship often leads to:
- Repeat signal loss
- Rain interference
- Loose cable faults
- Decoder communication errors
Professional installation ensures the system works properly from the beginning and reduces
future repair costs.
In most cases, a properly completed DStv installation takes between 45 minutes and 2 hours, but
more complex properties can take longer because quality signal work cannot be rushed.
What is needed for DSTV Installation?
A stable DStv installation depends on proper equipment. Every part plays an important role.
Satellite Dish for Receiving Signal
The dish captures the signal directly from the satellite in orbit.
Smart LNB for Signal Collection and Distribution
This converts the satellite signal and sends it to the decoder.
Decoder for Channel Processing
The decoder converts the signal into viewable television channels.
High-Quality Coaxial Cable
Cable quality directly affects signal strength.
Weatherproof Connectors
Poor connectors often cause hidden signal problems.
Strong Mounting Bracket
A stable bracket protects dish position during wind.
HDMI Cable for Modern Television Connection
This ensures good picture quality.
Power Supply and Surge Protection
Stable electricity protects decoder performance.
Professional installers usually recommend replacing poor-quality old cable because cable
deterioration is one of the most common causes of weak signal.
Why Smart LNB Is More Important in 2026 Than Older
LNB Systems
Smart LNB technology has become a standard requirement in modern DStv installation in South
Africa because newer decoder systems perform better when connected to Smart LNB rather than
older LNB setups. In 2026, many households upgrading their DStv systems are replacing old
LNB units because older technology often limits signal performance and future compatibility.
Improved Decoder Compatibility
Newer decoders such as DStv Explora work more efficiently with Smart LNB because the signal
communication is designed for newer decoder architecture. Older LNB systems often create
setup challenges during installation and channel activation.
Better Multi-Room Setup
Smart LNB makes Extra View installation easier because signal distribution between multiple
decoders becomes more stable. Homes using two or more viewing points usually experience
better decoder communication when Smart LNB is installed correctly.
Cleaner Signal Transfer
Smart LNB improves signal quality by providing cleaner signal transfer across connected rooms.
This helps reduce:
- Channel freezing
- Signal interruptions
- Weak HD channel performance
Future Upgrade Compatibility
Smart LNB also helps homeowners avoid future replacement costs because newer DStv upgrades
are designed around Smart LNB systems.
Homes still using old LNB systems often face upgrade limitations, especially when adding new
decoders or expanding viewing points. Choosing Smart LNB during installation helps protect
long-term DStv performance.
How much is the DSTV Monthly Fee?
Monthly subscription fees depend on package selection.
Package | Monthly Fee |
EasyView | Around R30 |
Access | Around R150 |
Family | Around R339 |
Compact | Around R479 |
Compact Plus | Around R659 |
Premium | Around R979 |
Premium Package for Sports and Movies
This remains the highest package and includes premium sports channels, movies, documentaries,
and international content.
Compact Package for Balanced Entertainment
Many families choose Compact because it offers broad entertainment without premium pricing.
Family Package for Budget-Conscious Households
This package gives affordable access to children’s channels and general entertainment.
Access Package for Entry-Level Viewing
Suitable for basic home viewing needs.
Installation cost and monthly fee are separate expenses, so both should be planned together.
DSTV Installers near me
Searching for DSTV installers near me often shows many results, but experience matters
greatly.
A reliable installer usually offers:
- same-day installation
- signal troubleshooting
- dish alignment
- decoder repairs
- extra view setup
- cable replacement
Check Experience Before Booking
Years of installation experience often predict better signal quality.
Ask About Signal Meter Usage
Professional signal meters improve accuracy.
Confirm Whether Materials Are Included
Some quotes exclude cable or connectors.
Check If Workmanship Is Guaranteed
A guarantee protects against early faults.
Many customers discover too late that cheap installers often skip proper signal testing.
Best DStv Installation in South Africa
The best DStv installation in South Africa focuses on long-term viewing stability, maximum
signal strength, and reliable performance in all weather conditions rather than simply completing
the job quickly. A high-quality installation ensures that your channels remain clear during rain,
wind, and seasonal weather changes, while also reducing future repair costs and signal
interruptions. Many households choose the cheapest installer, but long-term results usually
depend on technical accuracy, proper materials, and attention to detail.
Professional DStv installers understand that every part of the installation affects signal quality. A
decoder can only perform properly if the dish is aligned correctly, the bracket is secure, the cable
is protected, and every connection is tested carefully before the work is complete.
The best DStv installation service in South Africa usually includes:
- Correct dish positioning
- Strong mounting hardware
- High-quality cable installation
- Accurate signal calibration
- Full decoder testing
- Stable channel verification
- Weather-resistant outdoor protection
A professional installer focuses on making sure the system continues working properly months
and years after installation, not just on the day the job is completed.
Correct Dish Alignment for Maximum Signal Strength
Correct dish alignment is one of the most important parts of a professional DStv installation
because even a very small angle error can weaken signal strength and affect viewing quality.
The satellite dish must face the correct direction to receive a strong signal. Installers use signal
meters to measure signal quality precisely rather than guessing by picture appearance alone.
During dish alignment, a professional installer checks:
- Horizontal angle
- Vertical elevation
- Satellite line of sight
- LNB positioning
- Signal quality percentage
Even slight dish movement can reduce signal strength. A dish that appears almost correct may
still cause:
- Signal loss during rain
- Freezing channels
- Missing HD channels
- Audio interruptions
Many future service call-outs happen because the original dish alignment was rushed or done
without proper signal testing.
Professional DStv installers in South Africa spend time adjusting the dish carefully until signal
readings are stable. This is especially important in areas where buildings, trees, or nearby
structures can interfere with satellite reception.
In homes, apartments, townhouses, and offices, proper dish alignment ensures that signal
remains strong even when weather conditions change.
Secure Dish Mounting Against Wind
The dish bracket must be mounted securely because movement later causes signal loss. Wind is
one of the most common reasons a previously working DStv installation suddenly loses signal.
The best installers never rush bracket installation because the bracket supports the full dish
permanently.
A strong installation includes:
- Heavy-duty wall plugs
- Tight anchor bolts
- Correct bracket levelling
- Strong wall placement
If the bracket is loose or mounted into weak wall material, even small vibration can change the
dish angle.
Poor dish mounting often causes:
- Intermittent signal loss
- Signal disappearing after storms
- Weak picture quality
- Frequent technician call-outs
Professional installers also choose mounting positions that reduce long-term movement.
A secure mounting position considers:
- Wall strength
- Roof safety
- Wind exposure
- Accessibility for future servicing
In coastal parts of South Africa where wind exposure is stronger, secure mounting becomes even more important because poor bracket work fails faster.
The best DStv installation always treats mounting as a critical technical stage rather than a quick drilling task.
Weatherproof Cable Protection
Outdoor cable protection is another major sign of the best DStv installation because exposed
cable often becomes the reason for future signal faults.
Outdoor cable must resist:
- Sun exposure
- Rainwater
- Temperature changes
- Wind movement
The best installers use high-quality cable and protect all outdoor joints properly.
Weatherproof installation includes:
- Waterproof connectors
- Secure cable clips
- Protected entry points
- Sealed external joints
Poor outdoor cable work often causes:
- Signal weakening after rain
- Rust at connectors
- Cable cracking
- Water entering cable lines
A professional installer avoids leaving loose cable hanging where wind can damage it over time. In South Africa, long hot summers and heavy rain can shorten cable life if cheap cable is used.
This is why experienced installers recommend high-quality RG6 cable for long-term signal
performance.
Weatherproof cable protection is especially important for:
- Houses with long external cable runs
- Double-storey homes
- Apartments with exposed balcony installations
- Offices with roof-mounted systems
Clean Internal Cable Routing
Clean internal cable routing improves both appearance and signal reliability. The best installers
do not leave cable loosely hanging inside the home or office.
Neat cable work helps protect signal quality because cable bends, crushing, or poor routing can
affect performance.
Good internal routing includes:
- Straight cable lines
- Safe wall clips
- Minimal cable stress
- Hidden routes where possible
Professional installers carefully plan cable entry into the building so that the cable remains
protected.
Poor internal cable routing often causes:
- Accidental cable damage
- Loose connections
- Connector strain
- Signal drops over time
In homes, neat cable routing also improves appearance because customers do not want visible untidy wiring across walls or floors. Townhouses and apartments often require extra cable planning because visible cable may need to follow strict body corporate rules.
The best DStv installation balances technical quality with a clean finished result.
Accurate Decoder Setup
Even when the dish and cable are perfect, poor decoder setup can still create channel problems.
Accurate decoder setup includes more than turning the decoder on.
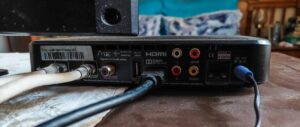
A professional installer checks:
- Correct signal detection
- Decoder software readiness
- Channel scanning
- Audio output
- HDMI connection
- Viewing settings
Incorrect decoder settings can cause:
- Missing channels
- Wrong channel grouping
- No signal messages
- Decoder freezing
Explora systems require even more care because Smart LNB communication must be correct. Extra View installations also require proper decoder communication testing between both units.
The best installers verify that:
- All subscribed channels display correctly
- HD channels are stable
- Decoder responds normally
- Remote functions work correctly
Many poor installations leave before full decoder testing is complete, which leads to customer
frustration later.
Why the Best Installers Focus on Detail Rather Than Speed
The best DStv installers focus on long-term reliability rather than speed alone.
Fast installation means little if future repairs become necessary.
A detail-focused installer checks:
- Signal strength before leaving
- All connectors twice
- Cable protection outdoors
- Decoder performance
- Channel stability
This reduces future service issues significantly.
Professional DStv installation in South Africa should always aim for:
- Stable signal
- Clear viewing
- Long-lasting materials
- Fewer repairs
A properly installed system can perform reliably for years when each technical step is completed
carefully.
How installation cost differs between Johannesburg,
Pretoria, Cape Town, Durban, and smaller towns
Location affects price because labour and travel costs differ.
Johannesburg
High competition often keeps pricing moderate.
Pretoria
Similar pricing to Johannesburg.
Cape Town
Some areas cost more because roof access is harder.
Durban
Coastal weather requires stronger weatherproofing.
Smaller Towns
Travel charges often increase total price.
Urban areas often have more installer availability.
Hidden DStv installation costs most customers forget to budget for
Some customers budget only for the main installation quote.
Extra Cable Length
Large homes often need more cable.
Dish Relocation
Moving old dishes adds labour.
Wall Drilling
Concrete drilling may increase labour.
Connector Replacement
Old connectors weaken signal.
Signal Correction on Existing Systems
Old poor installations often need rework.
These hidden costs often explain final invoice differences.
Common Mistakes Homeowners Make When Trying to Save
on DStv Installation
Many homeowners try to reduce DStv installation costs in South Africa, but cutting corners
during installation often creates much bigger expenses later because poor workmanship usually leads to signal problems, repeat technician call-outs, and early replacement of parts. The initial
saving may look attractive, but weak installation often results in unstable channels, poor signal
quality during rain, and unnecessary repair costs within a short time.
A professional DStv installation is designed to provide long-term viewing stability, while cheap
shortcuts often create recurring technical problems. The most common issue is that homeowners
focus only on paying the lowest price instead of ensuring the installation is done correctly the
first time.
Below are some of the most common mistakes that lead to future signal and decoder problems.
Using Cheap Cable
One of the biggest mistakes homeowners make is choosing cheap cable to reduce installation
costs. Cable quality directly affects signal strength because the signal travels from the dish to the
decoder through that cable every day.
Cheap cable often causes:
- Weak signal strength
- HD channel freezing
- Signal loss during rain
- Faster cable wear outdoors
Low-quality cable also deteriorates quickly under South African weather conditions, especially
where strong sun, rain, and wind affect exposed outdoor cable.
Professional DStv installers usually recommend high-quality RG6 cable because it protects
signal quality over a longer period and reduces future repairs.
Cheap cable may look similar at first, but over time it often develops:
- Cracks in the outer covering
- Internal signal loss
- Water penetration
- Connector failure
This means a homeowner who tried to save money initially may later pay for full cable
replacement.
Wrong Dish Angle
Another major mistake is incorrect dish alignment. Many homeowners assume that a dish only
needs to point roughly in the correct direction, but even a very small angle error can weaken
signal performance significantly.
The satellite dish must be aligned precisely for:
- Horizontal direction
- Vertical elevation
- LNB positioning
A dish that looks almost correct may still cause:
- Missing channels
- Weak signal readings
- Picture freezing
- Signal failure in bad weather
Small angle mistakes become obvious during rain because weak signal disappears first.
Professional installers use signal meters because manual guessing often leaves the dish slightly
off position.
Incorrect alignment is one of the biggest reasons households call technicians again after trying
low-cost installation.
Loose Connectors
Loose connectors are another common problem when trying to save on installation costs.
Connectors join the cable to the decoder and dish, and if they are not fitted tightly, signal
becomes unstable.
Loose connectors often cause:
- Intermittent channels
- Audio problems
- Signal dropping suddenly
- No signal messages
Connectors also need protection from moisture outdoors. Poor connector work allows water
inside, which weakens signal further.
A professional installer checks all connectors carefully before leaving because even one loose
point affects the whole system.
Weak Brackets
Weak brackets create long-term signal problems because dish movement changes alignment over
time.
A weak bracket may seem acceptable on installation day, but later causes:
- Signal loss during wind
- Dish vibration
- Gradual signal weakening
Strong mounting is critical because the dish must remain stable for years.
Professional installers use:
- Strong wall plugs
- Heavy-duty bolts
- Correct wall positioning
Weak bracket installation often leads to future call-outs after storms or windy conditions.
Good Installation Prevents Repeated Service Calls
The biggest saving comes from installing DStv correctly once rather than paying for repeated
repairs later. Good installation reduces future problems because every technical detail is
completed carefully.
A professional installation protects:
- Signal quality
- Decoder performance
- Cable durability
- Viewing stability
That is why homeowners who invest in proper DStv installation usually spend less over time
than those who choose shortcuts.
When to repair old equipment instead of replacing everything
Not every old system needs full replacement.
Old Dish Still Stable
A solid dish may still work well.
Cable Condition Matters
Damaged cable often causes more issues than old dishes.
LNB Age Determines Upgrade Need
Older LNB systems often need replacement.
Decoder Compatibility
Some old decoders still function properly.
A technician usually determines this during inspection
How often should a DStv system be serviced?
A properly installed system may last years without major service, but occasional inspection
helps.
After Severe Storms
Dish position may shift.
When Signal Drops
Weak signal usually needs testing.
If Channels Pixelate
This often indicates cable issues.
Before Decoder Upgrades
Signal should be checked before adding new equipment.
Routine checks prevent larger repairs.
Frequently Asked Questions
1. Can I install DStv myself without professional help?
Yes, but satellite alignment requires precision and most homeowners do not have signal meters
to do it correctly. Even if the dish seems aligned, weak signal often appears during bad weather.
Professional installers complete the job faster because they know correct angles and satellite
direction. In most cases, professional installation saves money over time because it avoids
repeated adjustments.
2. Does installation cost include the decoder and dish?
It depends entirely on the installation package you choose. Some installers charge only labour if
you already own equipment, while full installation packages include all hardware. A complete
setup usually includes the dish, Smart LNB, cable, connectors, and technical labour. Customers
should always confirm exactly what is included before booking.
3. How much does signal repair usually cost in South Africa?
Signal repair usually starts from about R450 depending on the cause of the fault. A simple dish
alignment costs less than replacing damaged cable or connectors. If storms damaged the bracket
or LNB, the cost may rise further. A proper signal test usually identifies the problem quickly.
4. Can one DStv dish connect to several televisions?
Yes, one dish can serve multiple televisions using Extra View and compatible decoder systems.
Smart LNB usually makes this easier and more stable. Each extra TV point needs extra cable and
careful setup. Professional installation ensures all connected TVs receive stable signal.
5. How long does a satellite dish normally last?
A good satellite dish can last many years when mounted properly. The dish itself often lasts longer than connectors and cable. Wind and storms affect poorly mounted dishes more quickly. Regular inspection helps extend system life.
What most South Africans should realistically budget for DStv installation in 2026
In conclusion, understanding the cost of installing DStv in South Africa in 2026 helps you plan effectively and avoid unexpected expenses while enjoying quality home entertainment. A common question is how long does it take to install DStv?—in most cases, a standard installation is completed within 1 to 3 hours, depending on the setup complexity and additional features like Extra View. You may also wonder what is needed for DStv installation?, which typically includes a satellite dish, decoder, smart LNB, cabling, and a compatible TV, all properly installed and aligned to ensure strong signal reception and long-term performance. Another important factor is how much is the DStv monthly fee?, which varies based on your chosen package, allowing you to select an option that fits both your entertainment needs and budget. For those in Cape Town seeking reliable and professional services, DSTV Installation and Repairs Pty Ltd stands out as the best choice, offering expert technicians, fast and efficient installations, affordable pricing with no hidden costs, and guaranteed quality workmanship.
If you want your DStv installed correctly the first time with no signal issues or delays, don’t hesitate, CONTACT US today at 0780160090 and let us provide you with a seamless, stress-free installation experience.